Set up MX Records for Microsoft 365
In this guide, you’ll learn how to set up Microsoft 365 mx records so you can send and receive email on a custom domain.
If you haven’t already added your domain, see How to Add a Custom Domain to Microsoft 365.
Get MX Records from Microsoft 365
Section titled “Get MX Records from Microsoft 365”-
Sign into the Microsoft 365 Admin Center
-
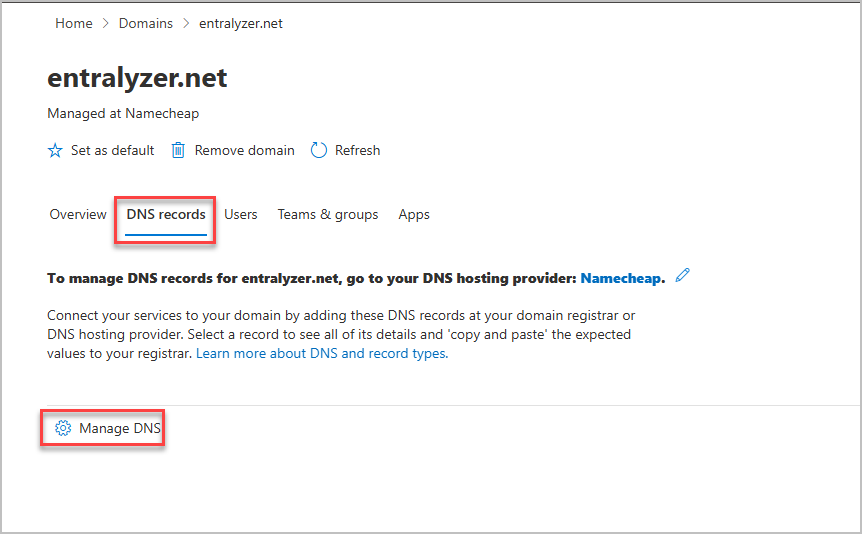
Go to
Setting>Domains. -
Click on your domain.
-
Click DNS records then click Manage DNS.
-
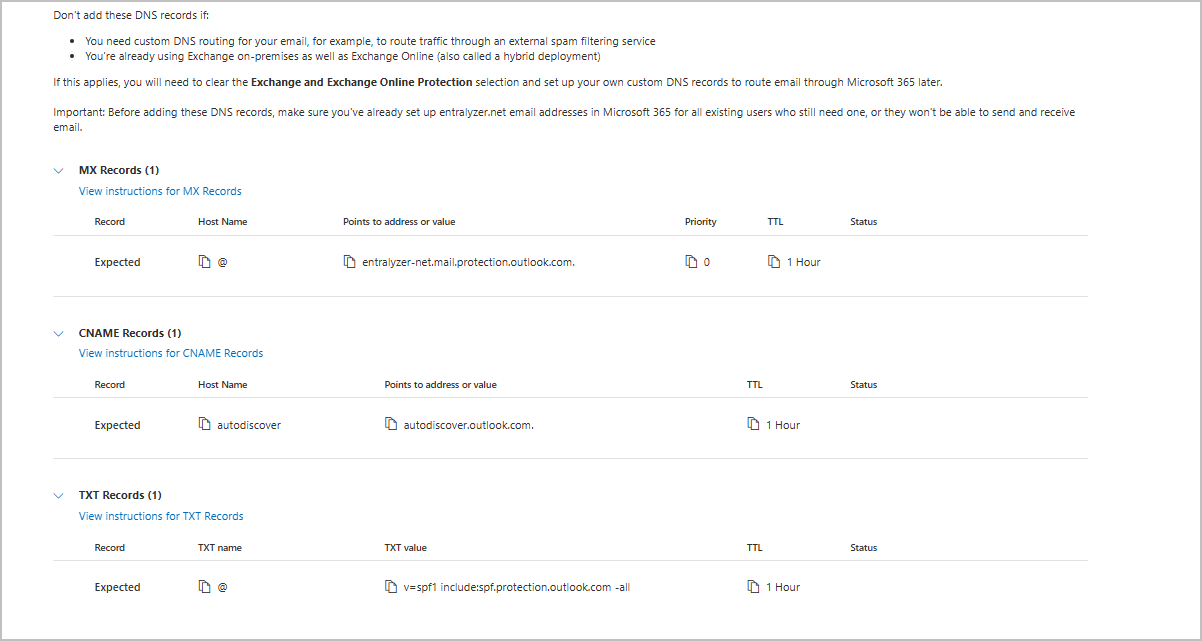
Click Continue.
-
You can either click Download CSV file or copy the MX record settings from the page. I find it easier to leave the page open and copy the values from the page.
Add MX Records to your domain’s DNS settings
Section titled “Add MX Records to your domain’s DNS settings”-
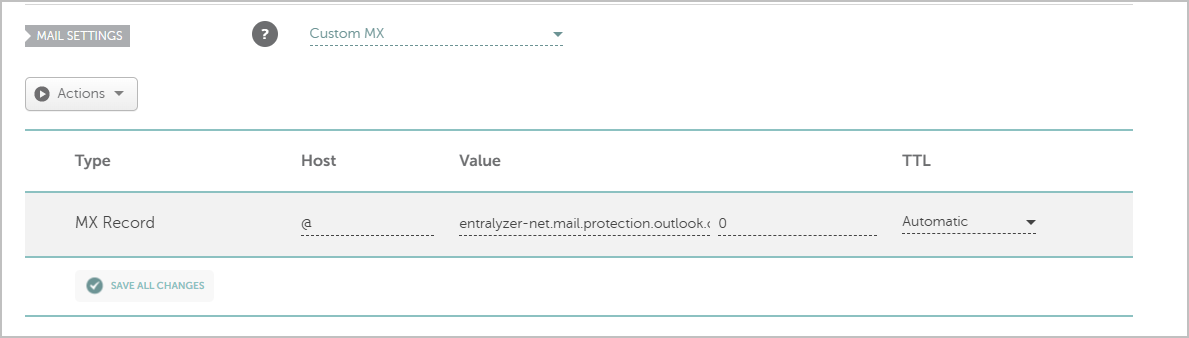
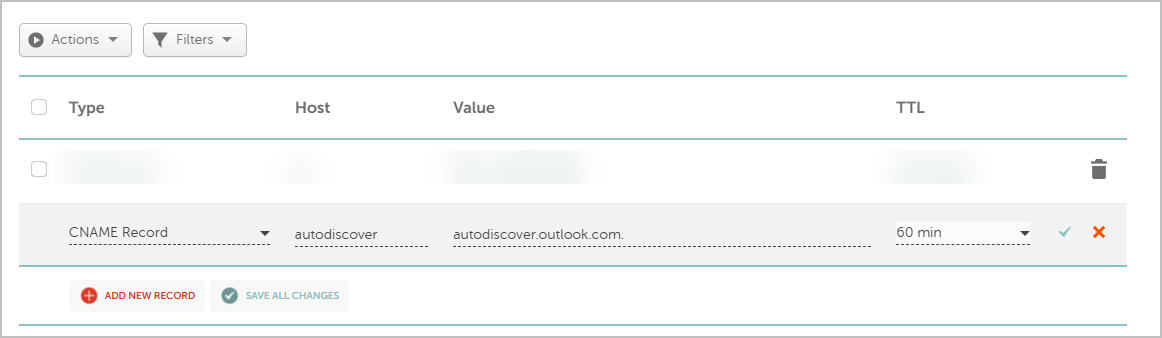
Access your domains DNS settings, this is typically the same place where you purchased your domain (called domain registrar), for example namecheap, godaddy, cloudflare, etc.
-
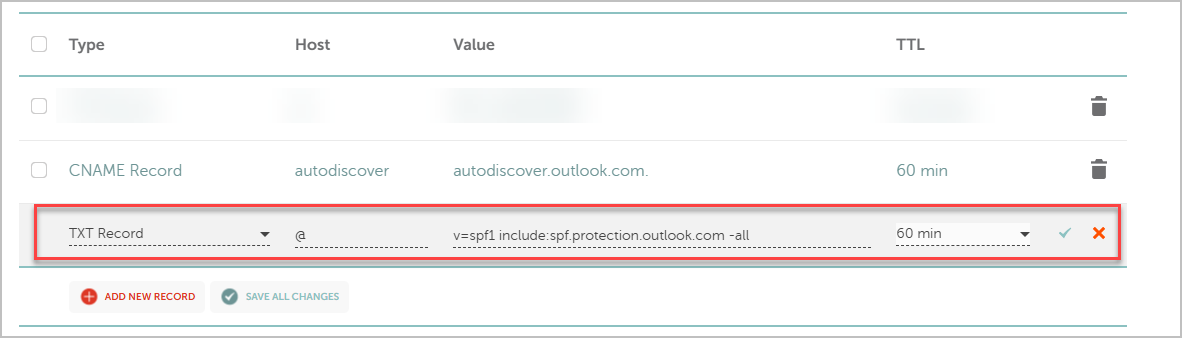
You will need to add 3 DNS records.
- MX Record
- CNAME Record
- TXT Record
MX Record Example
CNAME Record Example
TXT Record
-
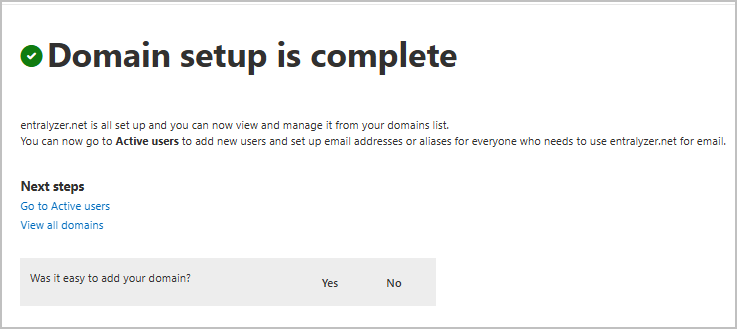
When the MX records have been added to your domain’s DNS settings, go back to the Microsoft 365 Add DNS Records page and click Continue. Microsoft will verify the DNS records and complete the DNS setup.
-
If your domain is showing Healthy in 365, you should now be able to send and receive email from your custom domain.